I want to share with you how I isolate an image (crop for those of you who know what that means) so that when I make my cards I can make my image any size I want. These sweet images are 2 of 9 images from Gecko Galz Pretty Seed Packs, they were all on the same collage sheet together. So how did I blow them up to make them fit on my 5 x 7 card front you ask? Well I showed you how to make the card in Word, but I did not show you how I isolated the images. This is a step by step instruction on how I do it using PicMonkey free photo editing software. I do want to mention they have some really awesome photo editing tools if you sign up for the purchased version, but for this tutorial, the free version is all you need.
I am using one of the free collage sheets that Gecko Galz gives away every month just for signing up for the newsletter, a wise choice I might add.
Go to PicMonkey, free and safe photo editing web site.
Click on the icon that says edit, right next to the icon that says touch up.
That will open a dialogue box (file upload) on your computer allowing
you to choose where the collage sheet is stored. After you have done
this a few times it has a memory and will remember where you get things
from and where you want to save them to also. If the sheet is not in
the first set of files you see, look to the left side of the dialogue
file upload box, your choices (among many others will be desktop, or
computer,) you will have to know where you have saved these collage
sheets to, I saved mine to A Pic Monkey Tutorial here. That will put the collage sheet on the Pic Monkey editing page. This was the free sheet I received in the Gecko Galz newsletter.
On the left side column of that page you will see a bunch of tools, under Basic Edits, you want Crop, click on it and you will see a box inside your collage sheet. You can click on the center and move the box, then drag the corners in or out, by using the click and hold (left side of mouse) to drag it into position on just of the 1 if 9 images on your collage sheet.
Once you have it framed in exactly like you want, look to the Crop toolbar again you will see a green Apply. Click on that, the rest of the picture will fall away.
Now look above your picture, you will see OPEN, SAVE, SHARE, and arrows pointing left and right. You want to click on SAVE, you will be taken to another page where it will say Save this masterpiece to my computer, HERE IS THE MOST IMPORTANT PART, you will see FILE NAME, the name or title of the image, YOU MUST CHANGE THIS IN SOME SMALL WAY, ADD A NUMBER OR A LETTER, I USUALLY ADD THE NUMBERS 1-9 FOR THE 9 IMAGES. IF YOU DO NOT CHANGE THE NAME, YOU WILL BE LEFT WITH ONLY THE 1 IMAGE YOU CROPPED in your storage, YOU WILL LOSE THE REST OF THE PAGE. Also, be sure to keep the name of the collage sheet with the "addition " of numbers or letters, otherwise when you do another collage sheet 1-9 it will ask if you want to overwrite these you just did and it would then erase them if you said yes. (it would come up and say a file with the same name exists, do you want to change that file? saying yes would replace it) Sometimes I forget to add the number, so when that message comes up you can say Cancel and go back and add your number).
Image below shows original file name
Image below shows ALTER BY ADDING in the place where I want you to ADD the number 1
Then after
changing the name, you can click on the green bar that says "Save to my
computer" the dialogue box will appear asking you to choose where to
save it to, it is best to save it to the same place you took it from, I
usually make a folder and put the images all together in that folder. Once you have chosen where to save it to just click SAVE.
Now this is the fun and easy trick I have learned, you just clicked save and the single image is on your screen, all you have to do is click on the arrow that is next to the word "share", remember open, save, share and arrows? If you move your cursor over it it will say "undo the last action", (you already saved it to your computer so undoing it here will not change that).
That
arrow will bring you back to the full sheet where you can do this again
to the second image, that arrow will keep taking you back to the full
sheet. Once the full sheet is done, you can go to Open and start over
by bringing in another sheet. Just remember to save with an altered
name by adding a number.
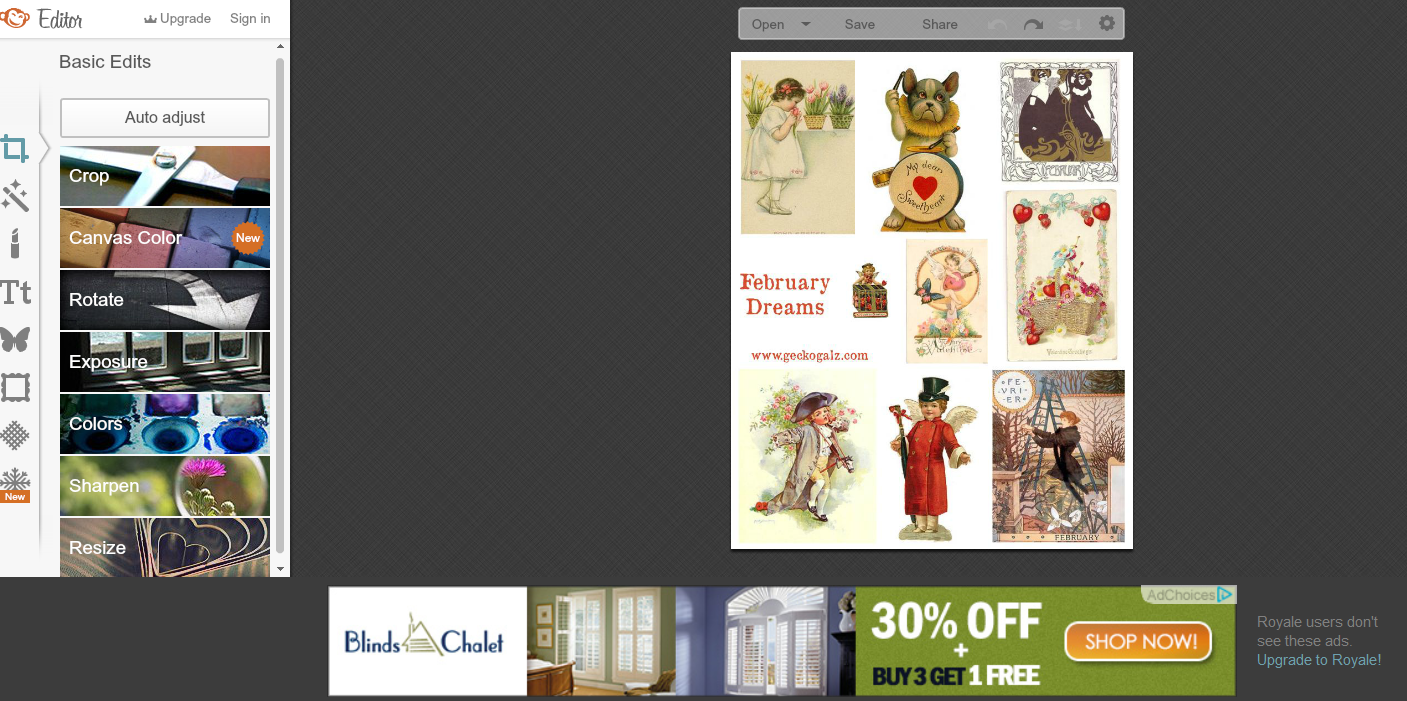
Well that's it, sorry it was so long, but I really wish someone would have shown me this when I first started working with digital images, it would have made it so much easier!
I will show you another time how to add a watermark using PicMonkey photo editing tools, and thank you PicMonkey for making them available to us all.
Thanks for stopping by, I'm looking forward to reading your comments on this. If you have any questions, I would be happy to help. ~Diane
Please join me by Banning Word Verification from your blogs, please be kind and choose comment moderation instead.